

How To Draw A Photo As A Constellation In Photoshop
In this photo effects tutorial, we'll learn how to easily fill an empty night heaven with stars using Photoshop CS6. This tutorial is also fully compatible with Photoshop CC (Creative Deject). If you're using Photoshop CS5 or earlier, you'll desire to cheque out the original version of our Starry Night Sky tutorial.
Capturing a star-filled night sky with our cameras tin can exist tricky. Frequently there are other, brighter light sources nearby (like metropolis lights), and of form there'southward the added trouble of our planet refusing to play nice and stop spinning for us during the exposure. What we often end up with is either an interesting (but unwanted) star trail effect or a nighttime sky filled with nothing but darkness. Fortunately, every bit we'll see in this tutorial, Photoshop makes it like shooting fish in a barrel to add together the stars into our photos later, with the boosted benefit of being able to command only how "starry" the heaven becomes. The result may not fool any astronomers or astrophysicists in the family, but considering that this aforementioned technique is ofttimes used to create star-filled backgrounds for movies, the consequence is more than than realistic enough to fool pretty much anybody else.
Here's the photograph I'll be starting with (metropolis at night photo from Shutterstock):
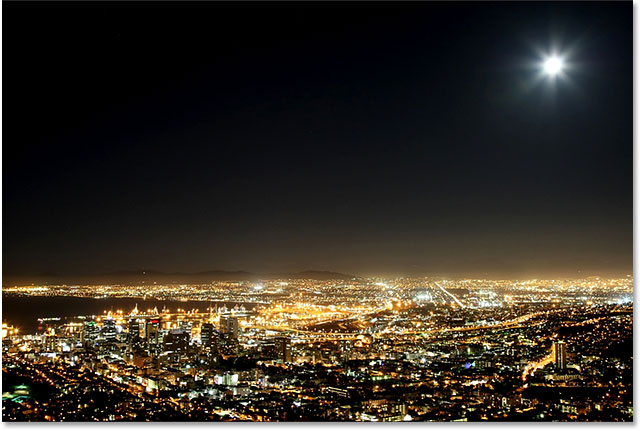
The original photograph.
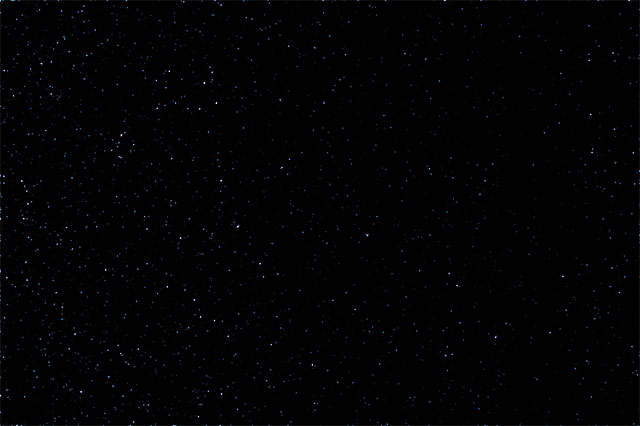
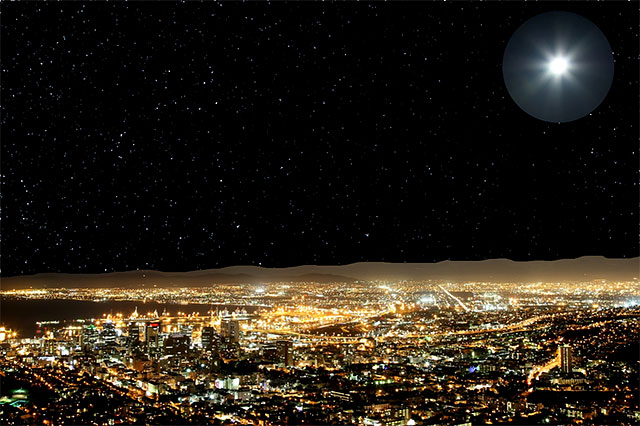
And here'due south what the final "starry night sky" effect volition await like:

The final effect.
This tutorial is from our Photograph Effects series. Let'southward go started!
How To Create A Starry Night Sky With Photoshop
Pace i: Add A New Bare Layer
With our photo newly opened in Photoshop, if we await in the Layers panel, we encounter the image sitting on the Background layer which is currently the only layer in the document:
The Layers console showing the original image.
Let's add a new blank layer for our stars. Click on the New Layer icon at the bottom of the Layers panel (second icon from the right):
Clicking the New Layer icon.
Photoshop adds a new blank layer named Layer i in a higher place the Groundwork layer:

The new blank layer is added.
Step two: Fill The New Layer With Black
We demand to fill our new layer with blackness. For that, we'll apply Photoshop's Fill control. Go upwards to the Edit menu in the Bill of fare Bar along the top of the screen and choose Fill:
Going to Edit > Fill.
This opens the Fill dialog box. Modify the Employ choice at the superlative of the dialog box to Black. In the Blending section in the bottom half of the dialog box, make sure Way is set to Normal and Opacity is ready to 100% (which they should exist gear up to past default):
Irresolute the Employ selection to Blackness.
Click OK when you're done to close out of the Fill dialog box, at which point Photoshop fills the new layer with blackness, temporarily blocking our photo from view:

Filling the top layer with black hides the photograph on the layer below information technology.
Step 3: Catechumen The Layer Into A Smart Object
In a moment, we're going to apply a couple of Photoshop's filters to this black-filled layer. But before we do, allow'due south first catechumen the layer into a Smart Object. That way, our filters volition exist applied as Smart Filters, allowing usa to become back and edit their settings later if we demand to. With Layer i selected (information technology should be highlighted in blue), click on the pocket-sized menu icon in the top right corner of the Layers panel:
Clicking the Layers panel menu icon.
And then cull Convert to Smart Object from the menu that appears:
Selecting Convert to Smart Object from the Layers panel menu.
Naught will seem to have happened to the prototype, but a pocket-size Smart Object icon appears in the lower correct corner of the layer's preview thumbnail in the Layers panel. This lets us know the layer is at present a Smart Object:
Smart Objects are indicated by a small icon in their preview thumbnail.
Step 4: Use The Add Noise Filter
Nosotros're ready to add our filters, and we'll start with the Add Racket filter. Go upwards to the Filter carte du jour at the top of the screen, choose Noise, then choose Add Racket:
Going to Filter > Noise > Add together Noise.
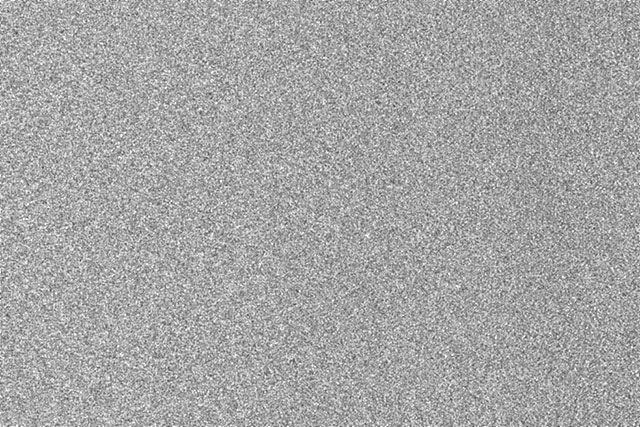
This opens the Add together Noise dialog box. The Add together Noise filter basically adds a bunch of little white, single-pixel dots to the black-filled layer, and nosotros control how many dots are added using the Amount value. Enter a value of around 25%. At the lesser of the dialog box, set the Distribution selection to Gaussian and select the Monochromatic pick, which will prevent any colors other than black and white from actualization in the noise:
The Add together Racket dialog box.
Click OK to shut out of the Add together Noise dialog box. Photoshop fills the layer with noise (random dots):
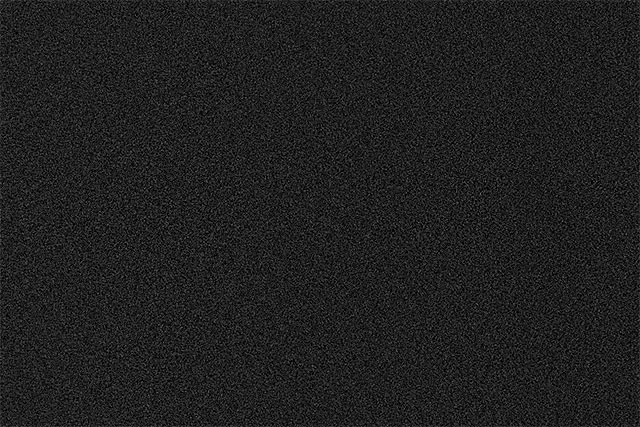
The image after applying the Add together Dissonance filter.
If we expect back in the Layers panel, we meet the Add Noise filter listed as a Smart Filter below Layer one:
The Layers panel showing the Add Noise Smart Filter.
Step v: Apply The Gaussian Blur Filter
Now that we've added some dissonance, we demand to add a bit of blurring to information technology, which will make those single-pixel dots a chip wider and clump some of them together. We'll practice that using Photoshop'south Gaussian Blur filter. Go back up to the Filter menu, cull Blur, then choose Gaussian Mistiness:
Going to Filter > Blur > Gaussian Blur.
This opens the Gaussian Blur dialog box. We control the amount of blurring using the Radius value, and you lot tin either enter a value direct into the Radius box or drag the slider along the bottom to increase or decrease the value. The value you'll desire to enter here will depend on the size of your prototype. Mostly, a Radius value of 2 to 6 pixels works all-time, with 2 pixels being ideal for small images and 6 pixels for very large images.
The nice affair is, since we're adding the Gaussian Blur filter as a Smart Filter, we tin easily go back later and try a different value. I'chiliad going to enter a Radius value of 3 pixels:
Setting the Radius value to 3 pixels.
Click OK when you lot're done to close out of the dialog box and apply the blurring outcome to the dissonance. If we expect again in the Layers panel, we run into both the Add Dissonance and Gaussian Blur filters listed as Smart Filters beneath Layer one:
Both filters are now listed as Smart Filters.
If you lot decide later on that you want to effort a different Radius value for the Gaussian Blur filter, all you'll demand to do is double-click directly on the words Gaussian Blur:
Double-clicking on the Gaussian Blur Smart Filter.
This will re-open the filter's dialog box where you can enter in a different Radius value, again anywhere from 2 to 6 pixels depending on the size of your image. Merely click OK when you lot're done to close dorsum out of the dialog box. Yous tin do this every bit oft as you lot like because Smart Filters in Photoshop are non-destructive, meaning no permanent changes are ever made to the image. Using Smart Filters with our effects go far piece of cake to fine-melody them and get them looking just correct.
Step half dozen: Add A Levels Adjustment Layer
Next, we need to brighten the lightest areas of our dissonance layer and darken the darkest areas. This will turn the faint, blurry dissonance into our stars. Press and hold the Alt (Win) / Option (Mac) fundamental on your keyboard and click on the New Adjustment Layer icon at the bottom of the Layers panel:
Clicking the New Adjustment Layer icon while pressing and holding Alt (Win) / Option (Mac).
Choose a Levels adjustment layer from the carte that appears:
Choosing a Levels adjustment layer.
Photoshop will pop open the New Layer dialog box. Select the Use Previous Layer to Create Clipping Mask pick past clicking inside its checkbox. This will clip our adjustment layer to the dissonance layer below it, meaning that anything nosotros do with the Levels aligning layer will bear on only the noise layer. The original image on the Background layer will not be afflicted. Click OK when yous're done to close out of the dialog box:
Checking the Use Previous Layer to Create Clipping Mask option.
Photoshop adds the new Levels adjustment layer, named Levels ane, higher up the racket layer. It appears indented to the correct with a pocket-size arrow pointing downwardly at the layer below it. This tells us the aligning layer is clipped to the dissonance layer:
The Levels adjustment layer (Levels ane) is added above Layer 1.
Learn how clipping masks work in Photoshop
Footstep vii: Adjust The White And Blackness Betoken Sliders
The controls and options for the Levels aligning layer appear in the Properties console. In the center of the panel is the Histogram, a graph showing united states of america the current tonal range of the prototype (or in this case, the tonal range of the noise layer). Directly beneath the histogram are 3 little sliders. The one on the far left, filled with black, is the black betoken slider. The one on the far right, filled with white, is the white indicate slider. At that place'south also a gray slider in the heart, just for this outcome, we won't need to use it:
The black point (left) and white indicate (correct) sliders.
Click on the white point slider on the right and begin dragging information technology towards the left. As y'all drag, you'll see the lighter areas of the racket becoming brighter. Elevate the slider all the way over to where the right side of the histogram begins. This volition brighten the lightest areas of noise to pure white:

Dragging the white betoken slider to the correct side of the histogram.
Here's what my image looks like after dragging the white indicate slider to the left:
The lightest areas of noise are now much brighter.
Next, click on the blackness point slider on the left and begin dragging information technology towards the right. As yous drag, you'll see the darkest areas of noise becoming pure black. Every bit you drag the slider further, more and more than of the racket will disappear into the darkness. You'll demand to drag the black point slider very shut to the white betoken slider to reach the best results, and you'll probably want to play around with both sliders a bit to fine-melody the result:

Dragging the black point slider to the right.
Here's my stars upshot later on dragging the blackness signal slider. One of import annotation is that if you're creating the result for impress, you'll want to adjust the white and black point sliders then that it looks like you actually accept more stars than you need, and that's considering yous'll lose some of the effect during the print process. If you're creating the effect strictly for the screen, you won't demand to worry it:
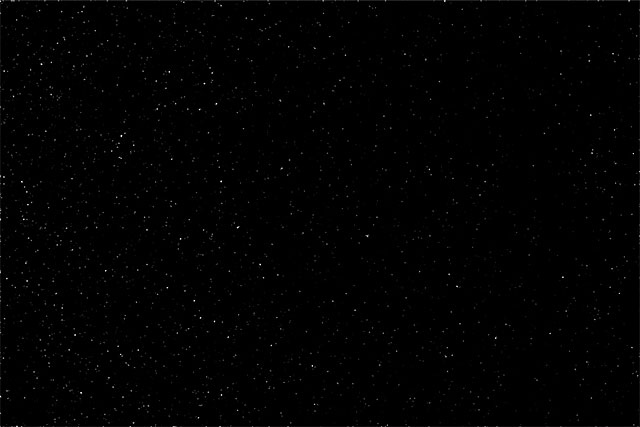
The effect after adjusting the black point slider.
I mentioned before that you can go back at any indicate and re-suit the amount of blurring beingness practical to the noise layer by double-clicking on the Gaussian Blur Smart Filter in the Layers panel (meet Step v). You can as well go back and re-adjust these white bespeak and blackness signal sliders. Simply click on the Levels aligning layer in the Layers panel to brand it the active layer (if it isn't agile already), then drag the sliders in the Backdrop panel. Just like Smart Filters, aligning layers in Photoshop are non-subversive and fully editable. No permanent changes are made to the image.
Step eight: Add together A Hue/Saturation Aligning Layer
Let's add a bit of colour to the stars, and we tin can do that using a Hue/Saturation adjustment layer. Once once more press and agree your Alt (Win) / Option (Mac) key on your keyboard, then click on the New Adjustment Layer icon at the lesser of the Layers panel:
Clicking again on the New Aligning Layer icon while holding Alt (Win) / Selection (Mac).
Select a Hue/Saturation adjustment layer from the list that appears:
Choosing Hue/Saturation from the menu.
Photoshop will again popular open the New Layer dialog box. Just every bit we did before, select the Utilize Previous Layer to Create Clipping Mask selection by clicking within its checkbox:
Selecting the Use Previous Layer to Create Clipping Mask pick.
Click OK when you're washed to close out of the dialog box. Photoshop adds a new Hue/Saturation adjustment layer named Hue/Saturation ane in a higher place the Levels layer (I've expanded the width of the Layers console in the screenshot only to make the name visible). This new aligning layer is also clipped to the noise layer, allowing us to colorize but the noise, not the original image:
The Layers panel showing the new Hue/Saturation adjustment layer.
With the Hue/Saturation aligning layer active in the Layers panel, the Backdrop panel changes to the Hue/Saturation controls and options. First, select the Colorize choice most the bottom of the dialog box past clicking within its checkbox. Then, drag the Hue slider to select whichever color you like for your stars. I remember bluish looks nice, so I'll elevate my Hue slider over to the right to a value of around 212. If you think the color looks as well intense, drag the Saturation slider towards the left to reduce it. I'll lower my Saturation value from its default value of 25 down to 15:
Checking Colorize, then dragging the Hue and Saturation sliders.
Here's my epitome after colorizing the stars. The colorizing effect is quite subtle and then it may be easier to see the event with your ain prototype in Photoshop than information technology is in this screenshot:
The upshot after colorizing the stars.
Stride ix: Grouping All Three Layers In a higher place The Groundwork Layer
Of course, we do have 1 big problem at the moment. Our stars are completely blocking the original photo from view. Let'due south fix that, and we'll start by taking all three layers that are combining to create the stars result (in other words, all the layers sitting above the Background layer) and grouping them together into a layer grouping.
With the meridian Hue/Saturation layer selected in the Layers console, hold down the Shift cardinal on your keyboard and click on the noise layer (Layer 1). This will select all three layers at once (they'll all appear highlighted in blue):
All three layers higher up the Background layer are selected.
With the layers selected, click on the Layers panel menu icon in the top right corner:
Clicking the menu icon.
Choose New Group from Layers from the menu:
Selecting New Group from Layers from the Layers panel carte.
Photoshop opens the New Group from Layers dialog box. Name the grouping "Stars", and so click OK to close out of information technology:
The New Group from Layers dialog box.
The new Stars group appears in the Layers panel with our three layers inside it. If you click the triangle icon to the left of the folder icon, you tin can twirl the grouping open and see the layers nested within information technology. Click the triangle icon again to twirl it closed:
Layer groups are a peachy way to keep the Layers panel organized.
Learn all most layer groups in Photoshop
Footstep 10: Turn The Layer Grouping Off
Let's hide the Stars group temporarily and then nosotros can see our original image. To do that, click on the layer group's visibility icon (the little eyeball):
Clicking the layer group's visibility icon.
The original prototype reappears in the document:
The original image is in one case once again visible.
Step 11: Select The Area Where The Stars Should Non Appear
Now that we can meet our image again, we need to select the surface area where the stars should non be visible. In my case, that would be the city in the bottom of the image, as well as the (barely visible) mount range off in the distance. Photoshop has plenty of pick tools to cull from, and the 1 yous'll want to use will depend on the subject field yous need to select. I'm going to keep things simple here and get with the standard Lasso Tool which I'll grab from the Tools panel:
Selecting the Lasso Tool.
With the Lasso Tool in hand, I'll elevate forth the top of the city and mountain range. With this paradigm, there'southward no need to be surgically precise with my selection (which is why I chose the Lasso Tool) but I'll still keep my selection outline as shut to the edges of my discipline(s) equally possible. To select the sides and bottom of the photo, I can simply drag outside the epitome into the gray pasteboard area. Photoshop volition automatically snap the selection outline to the edges of the paradigm:
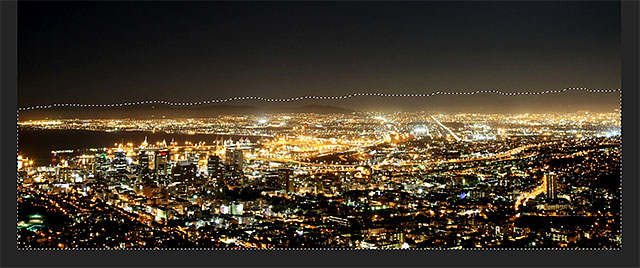
The expanse along the lesser of the paradigm is at present selected.
I retrieve I likewise want to select the area effectually the moon in the top right corner of the photo. For that, I'll utilise Photoshop'due south Elliptical Marquee Tool. To select information technology, I'll click and hold on the Rectangular Marquee Tool in the Tools panel, then I'll catch the Elliptical Marquee Tool from the fly-out menu that appears:
Selecting the Elliptical Marquee Tool.
The default behavior for about of Photoshop'southward selection tools, including the Elliptical Marquee Tool, is to create a brand new selection, but what I want to do here is add a new area to the selection I've already created, so I'll click on the Add to Choice icon up in the Options Bar:
Changing the behavior of the Elliptical Marquee Tool from New Pick to Add together to Selection.
Then, I'll position my mouse cursor in the heart of the moon. The pocket-sized plus icon ( + ) in the lower right of the cursor tells me I'm in Add to Option mode:
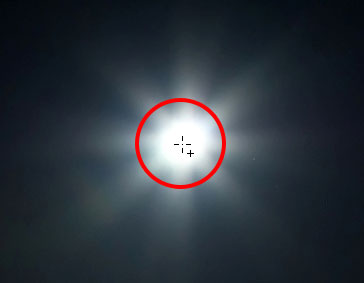
Centering the Elliptical Marquee Tool cursor inside the moon.
I'll click and, with my mouse button held downwards, I'll begin dragging outward from the middle. As soon equally I kickoff dragging, I'll press and agree Shift+Alt (Win) / Shift+Option (Mac) on my keyboard, then continue dragging. Holding the Shift fundamental will force my elliptical selection into a perfect circle, while the Alt (Win) / Pick (Mac) fundamental tells Photoshop to drag the selection outward from the spot I clicked on:
Centering the Elliptical Marquee Tool cursor within the moon.
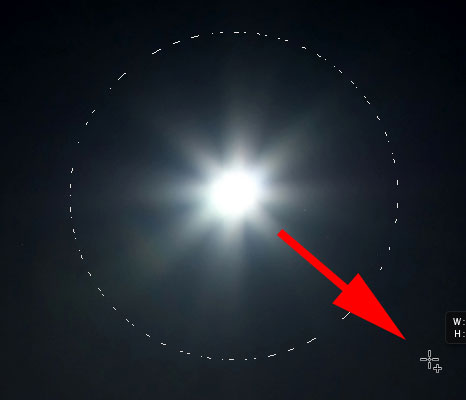
I'll release my mouse push button when I'm washed, and now we tin come across that I have both the urban center along the bottom of the photo and the moon in the upper right corner selected. These are the areas where the stars volition not appear:
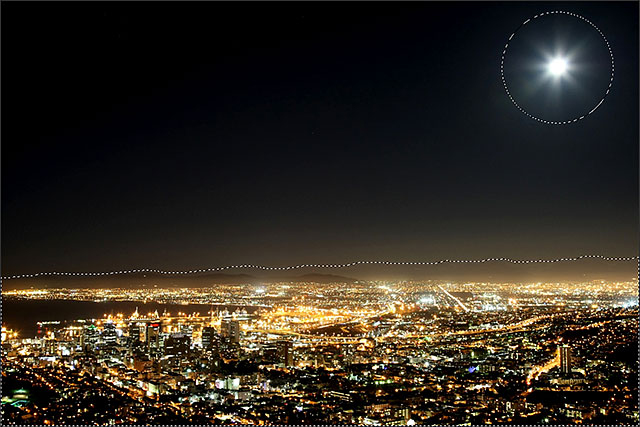
The expanse around the moon has been added to the initial choice.
Larn how to add, decrease and intersect your selections in Photoshop
Step 12: Plow The Layer Group Back On
Click once again on the layer group's visibility icon (the empty foursquare where the eyeball used to be) to brand the group visible again in the document:
Clicking the Stars layer group's visibility icon.
The stars will over again block the original paradigm from view, but the selection outline(s) will remain visible:
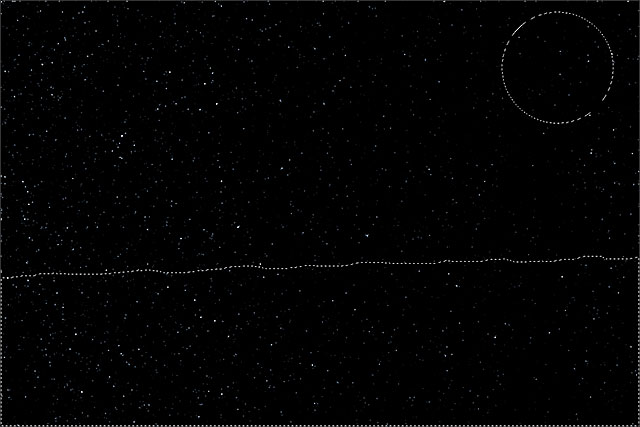
The selection outlines announced in forepart of the stars.
Step 13: Add together A Layer Mask
Printing and agree the Alt (Win) / Option (Mac) key on your keyboard and click the Add Layer Mask icon at the bottom of the Layers console:
Clicking the Add Layer Mask icon (while holding Alt (Win) / Option (Mac)).
Photoshop adds a layer mask to the Stars group and uses our selection to decide which areas of the group should remain visible and which should exist hidden. Normally, the area inside the selection would remain visible, but by holding downward the Alt (Win) / Choice (Mac) primal, we told Photoshop to do the opposite and keep everything outside the selection visible while hiding the areas inside information technology:
The image after calculation the layer mask.
If we wait in the Layers panel, we encounter that a layer mask thumbnail has been added to the Stars group, with black representing the areas that are subconscious from view and white being the visible areas:
The Layers panel showing the mask thumbnail.
Understanding layer masks in Photoshop
Step 14: Change The Blend Fashion Of The Layer Group To Screen
The just problem remaining is that I'm seeing harsh, ugly edges separating the visible and hidden areas of the stars. To blend the stars in with the original photograph and create seamless transitions, change the blend way of the Stars layer grouping from Laissez passer Through to Screen. The alloy fashion option is institute in the upper left corner of the Layers panel:
Changing the blend mode of the Stars grouping to Screen.
Here, later changing the alloy style to Screen, is my final starry night sky consequence:
The final result.
And there nosotros have it! Visit our Photo Effects section for more Photoshop effects tutorials! And don't forget, all of our Photoshop tutorials are ready to download as impress-ready PDFs!
Source: https://www.photoshopessentials.com/photo-effects/starry-night-sky-effect-photoshop-cs6/
Posted by: payneriess1962.blogspot.com
0 Response to "How To Draw A Photo As A Constellation In Photoshop"
Post a Comment